
At Water Damage Restoration Melbourne, we’ve helped hundreds of locals recover after flooding. Our team handles everything from damage checks and mould treatment to working with your insurance.
In this guide, we’ll walk you through every step of the repair process. You’ll learn what flood damage really means, when it’s safe to start rebuilding, and how to work with tradies and your insurance company. If you’re feeling overwhelmed, this guide will help you breathe easier.
Key Takeaways:
- Start with safety: Turn off utilities, check for structural damage, and avoid contact with contaminated water.
- Don’t rush repairs: Ensure your home is fully dried and cleared of mould before rebuilding.
- Get professional help: Assessments by builders and electricians are critical for safety and insurance.
- Handle insurance smartly: File claims early, document everything, and review your policy details carefully.
- Focus on full drying & mould clearance: Use certified services before reconstruction begins.
- Build back better: Use flood-resistant materials and consider retrofitting key systems.
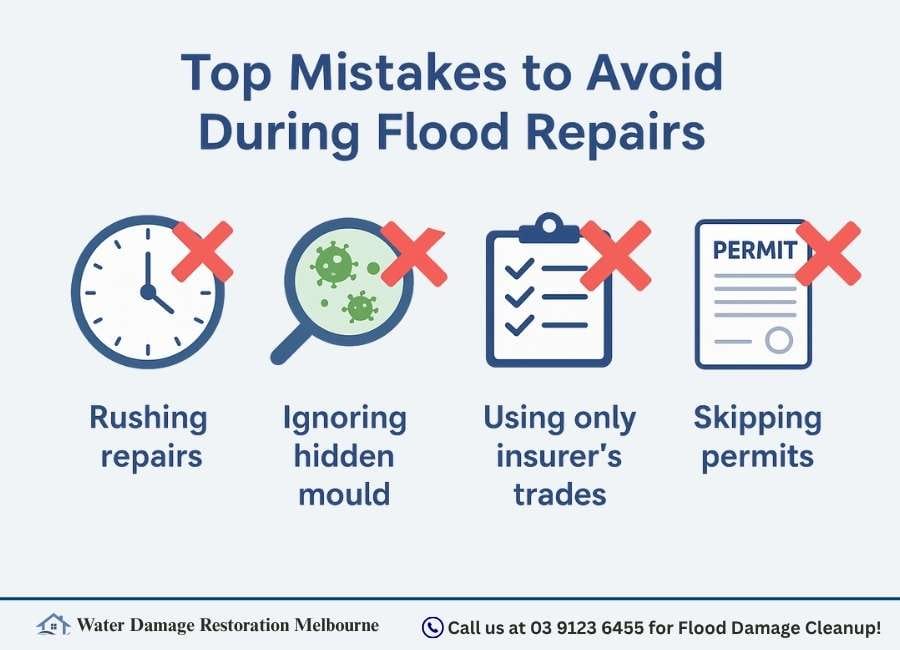
- Avoid common traps: Don’t rush, ignore mould, or blindly follow insurer recommendations.
What Is Considered Flood Damage in a Home?
Flood damage affects far more than just carpets. Water can weaken walls, floors, and ceilings, compromising structural integrity. Electrical wiring and plumbing may short out or clog, while insulation and cabinetry trap moisture, leading to odours and decay.
Furniture and personal items often become unsalvageable due to contamination. More critically, mould and bacteria can grow unnoticed behind walls or under floors, posing health risks. To assess the damage, because much of the damage is hidden, professional inspections are essential to ensure a safe recovery and also to prevent further damage.
For detailed guidelines on assessing flood damage, refer to the NSW Department of Planning and Environment’s Flood Impact and Risk Assessment.
Immediate Safety Checklist After a Flood
Turn Off Utilities
- Shut off electricity at the main breaker.
- Turn off gas lines; call the provider if unsure.
Check for Structural Damage
- Look for sagging ceilings, shifted walls, and cracked foundations.
- Do not enter until a professional clears the structure.
Avoid Contaminated Water
- Assume floodwater is unsafe. Use gloves, boots, and a mask.
Watch for Pests
- Check for snakes, rodents, and insects.
Contact Authorities If Needed
- Call emergency services if there’s structural risk, gas smell, or fire hazard.
After a flood, safety should be your first priority. If you’re unsure where to start, follow these immediate steps after a flood to protect your home and your family before beginning repairs.
When Should You Start Repairs After a Flood?
Although it’s tempting to begin repairs immediately after a flood, it’s critical to wait until the property is fully dried. Moisture trapped in timber, plaster, or flooring can lead to mould growth, structural damage, and costly rework.
Starting reconstruction before confirming the home is completely dry and free of mould not only risks health issues but can also compromise long-term repairs. Always have the property professionally assessed and dried, with mould clearance confirmed, before initiating any flood damage restoration work.
Step-by-Step Flood Damage Repair Process

Step 1 – Get a Professional Damage Assessment
The first step in flood recovery or restoration process is arranging a professional damage assessment. Licensed builders and electricians (sparkies) can accurately determine which parts of your home can be repaired and which must be replaced. Their inspection also confirms whether it’s safe to remain in the property.
Detailed documentation is essential; take clear photos and videos of all flood-affected areas and items, and maintain written records. This evidence will be critical for insurance claims and may speed up approvals and reimbursements.
- Do: Book inspections with a licensed builder and sparkie (electrician).
- Do: Take wide shots and close-ups of all affected rooms and valuables.
- Double-check: Log date, time, and location details for each photo.
- Avoid: Staying in a home with obvious damage until cleared by professionals.
Step 2 – Work with Your Insurance Provider
File your insurance claim as soon as possible after the flood. Review your policy carefully to understand what is covered and request a scope of work, a detailed list outlining the repairs required to restore your home. You’ll also need to decide whether to use the insurer’s recommended tradespeople or hire your own.
Keep a complete record of all communication, including emails, messages, and receipts, to support your claim. Be aware that not all policies include coverage for flood events like storm runoff or rising groundwater, so don’t hesitate to ask your insurer for clarification.
- Do: File your claim ASAP and request a “scope of work.”
- Do: Save all emails, receipts, and SMS communications.
- Double-check: Your choice of tradies — even if recommended by your insurer.
- Avoid: Assuming flood damage is covered — confirm with your provider.
Step 3 – Drying, Demolition, and Waste Removal
Proper drying and cleanup are critical to prevent long-term issues:
- Remove all water-damaged materials – Clear out soaked plaster, carpet, insulation, and soft furnishings to eliminate trapped moisture.
- Use industrial-grade drying equipment – Deploy dehumidifiers and air movers to dry walls, flooring, and structural cavities thoroughly.
- Follow council disposal guidelines – Dispose of flood-damaged materials in line with Melbourne council regulations for waste and hazardous items.
- Don’t rush this stage – Incomplete drying can lead to hidden moisture, causing mould growth and structural deterioration over time.
- Do: Remove all waterlogged materials — including walls and floor coverings.
- Do: Use commercial-grade air movers and dehumidifiers.
- Double-check: That you’ve met local disposal rules for contaminated waste.
- Avoid: Starting repairs before moisture levels are tested and stable.
Step 4 – Mould Treatment and Clearance
Mould often develops quickly after a flood and can spread into hidden areas like wall cavities and under floors. While surface sprays might seem effective, they typically don’t eliminate airborne or deep-rooted mould.
Professional mould remediation is essential; they can assess indoor air quality, locate hidden infestations, and issue a mould clearance certificate once your home is safe. Avoid starting any rebuilding work until this clearance is confirmed, as mould exposure can lead to serious health issues, including respiratory problems and persistent illness.
- Do: Hire IICRC-certified mould professionals for testing and clearance.
- Do: Ensure they inspect wall cavities and under floors.
- Double-check: That you receive a written mould clearance certificate.
- Avoid: Using DIY mould sprays — they only mask surface problems.
Step 5 – Rebuilding and Final Repairs
After your home is fully dried and cleared of mould, you can safely begin the rebuilding phase. Focus on repairing key areas such as walls, floors, kitchens, and bathrooms, and opt for flood-resistant materials like treated timber, tile, or water-resistant plasterboard to reduce future risk.
Engage a licensed builder or project manager to oversee the work and ensure it meets safety standards. Depending on budget and timelines, you can schedule repairs in stages; some non-critical areas can wait. This is also an opportunity to make your home more resilient against future flood events.
- Do: Prioritise essential rooms (kitchen, bathroom, bedrooms).
- Do: Use flood-resistant materials (e.g., treated timber, tile).
- Double-check: Licences and insurance of all contractors.
- Avoid: Skipping council approvals for structural changes.
How to Work with Trades and Contractors
Coordinating multiple tradespeople during flood recovery can be challenging, but a structured approach helps you stay in control:
- Schedule work in the correct sequence – Always complete drying and mould clearance before moving on to structural repairs like plastering or flooring.
- Get multiple quotes and verify licences – Compare at least two quotes from different restoration company and ensure all contractors are properly licensed and insured.
- Use written contracts – Document all agreements in writing and keep receipts, emails, and text communications for reference.
- Maintain clear communication – Be respectful but assertive. As the homeowner, you’re managing the project and setting expectations.
Mistakes to Avoid with Flood Repairs
Avoid these common errors to prevent long-term damage and delays in recovery:
- Starting repairs before the property is fully dry – Moisture left in walls or flooring can cause mould growth and structural problems.
- Overlooking hidden mould – Just because you can’t see it doesn’t mean it’s not there. Always get professional clearance.
- Relying solely on your insurer’s tradespeople – Vet all tradies yourself to ensure quality and proper licensing.
- Skipping council approvals – Some repairs require local council permits. Always check before starting major work.
Rushing flood repairs without proper checks can lead to bigger issues and added costs later. Take the time to do it right.
How to Make Your Home More Flood-Resistant
If your property has experienced flooding, to make your home more flood-resistant, it’s wise to take steps that reduce the risk of future extensive damage. Consider these practical upgrades:
- Raise electrical outlets and switches – Keeping power systems above flood height reduces the risk of electrical hazards.
- Use water-resistant building materials – Install flood-resistant flooring like tiles and treated timber, and moisture-resistant wall linings.
- Improve site drainage – Redirect water flow by grading soil away from your home and installing proper stormwater drainage systems.
Even modest improvements can reduce repair costs significantly and protect your home in future flood events.
For comprehensive guidelines on enhancing flood resilience in homes, refer to the NSW Government’s Practical ways to make your home flood resilient.
Visit Our Flood Damage Restoration ServicesShould You Retrofit Your Home for Flood Resilience?
Retrofitting your home for flood resilience is a proactive way to minimise future damage. Upgrades may include applying waterproof coatings to external walls, installing backflow prevention valves in plumbing systems, and elevating critical appliances or relocating them to upper floors. These measures not only reduce repair costs after a flood but also improve safety and property value.
In Victoria, homeowners may be eligible for government grants or support programs, so it’s worth checking official channels for the latest options.
Flood Damage Repair Process Summary
- Professional Damage Assessment
- Engage licensed builders and electricians to assess structural and safety issues.
- Document all damage with photos and records for insurance purposes.
- Work with Your Insurance Provider
- Lodge your claim early and review your policy coverage.
- Request a scope of works and decide on your preferred tradespeople.
- Keep all communication and receipts for claim support.
- Drying, Demolition, and Waste Removal
- Remove water-damaged materials such as carpet, insulation, and plaster.
- Use dehumidifiers and air movers to dry all affected areas.
- Follow Melbourne council rules for disposing of flood waste.
- Ensure full drying before moving to repairs.
- Mould Treatment and Clearance
- Hire professionals to test and treat hidden or airborne mould.
- Obtain a mould clearance certificate before rebuilding.
- Avoid exposure to mould due to serious health risks.
- Rebuilding and Final Repairs
- Reconstruct key areas using flood-resistant materials like treated timber and tile.
- Work with licensed builders and plan the project in stages if needed.
- Use this opportunity to improve your home’s future flood resilience.
Conclusion
Floods can leave behind more than just water damage; they disrupt your home, your health, and your peace of mind. But with the right plan and support, you can come back stronger.
At Water Damage Restoration Melbourne, we’re more than just cleanup experts—we’re your recovery partners. From the first inspection to the final repair, our team is here to help you protect what matters most. Learn more about our flood restoration services and how we can get your home back to normal quickly and safely.
Is your home ready for a safe and complete flood recovery?
Let our experts guide you from damage assessment to final repairs with confidence.
Book Your Free Flood Recovery Consultation ➔Frequently Asked Questions
How long does it take to fix flood damage?
Most homes, it takes to fix flood damage between 4 to 12 weeks to fully repair, depending on the extent of structural, electrical, and mould-related damage.
Who pays if I rent my home?
If you renting the house, the landlords are responsible for structural repairs. Tenants should rely on contents insurance to cover personal belongings.
Can I stay in my home during repairs?
To stay in a home during repairs depends on the severity of the damage, the presence of mould, and whether power and plumbing systems are safe. Temporary relocation is often recommended.
What if my walls still smell after drying?
If your walls still have a lingering odour after drying, it often indicates hidden mould or trapped moisture. Get a professional mould inspection before sealing, painting, or continuing repairs.


